Your phone and keyboard collect dust, skin oils, crumbs, and everyday grime. Because both devices are handled often, regular cleaning can keep them looking better and working properly.
The key is to use as little moisture as possible and avoid harsh products. Phones, laptops, and keyboards contain sensitive electronic parts that can be damaged by liquid, pressure, or the wrong cleaning solution.
Before You Start
Always check the manufacturer’s cleaning instructions before working on a device. Materials and protective coatings vary, especially among phone screens, laptop displays, and keyboards.
Gather these supplies:
– A clean, soft microfiber cloth
– A second dry microfiber cloth
– A small, soft brush
– A hand-operated air blower
– Cotton swabs for limited, careful use
– A small amount of approved cleaning solution
– Mild dish soap for some removable phone cases
Avoid using paper towels, tissues, abrasive sponges, household glass cleaner, bleach, aerosol sprays, or strong solvents. These products may scratch surfaces, remove protective coatings, or leave moisture inside the device.
Before cleaning any electronic device:
- Save your work and shut it down.
- Unplug the power cable and accessories.
- Remove the phone case, if applicable.
- Disconnect a separate keyboard from the computer.
- Wash and dry your hands.
- Work on a clean, dry surface with good lighting.
How to Clean Your Phone
1. Remove Dust and Loose Debris
Start with the phone turned off and disconnected from charging cables. Use a dry microfiber cloth to gently wipe the front, back, and sides.
For dust around buttons, ports, speakers, and the camera area, use a soft brush or a hand-operated air blower. Keep the brush light and avoid pushing debris farther into openings.
Do not insert toothpicks, pins, paper clips, or other sharp objects into charging ports, speaker openings, or microphones. They can damage delicate parts or pack debris more tightly inside.
If your phone has a removable case, clean it separately. Silicone and plastic cases can often be washed with a little mild soap and water, but check the case maker’s instructions first. Dry the case completely before putting it back on the phone.
2. Wipe the Screen and Exterior
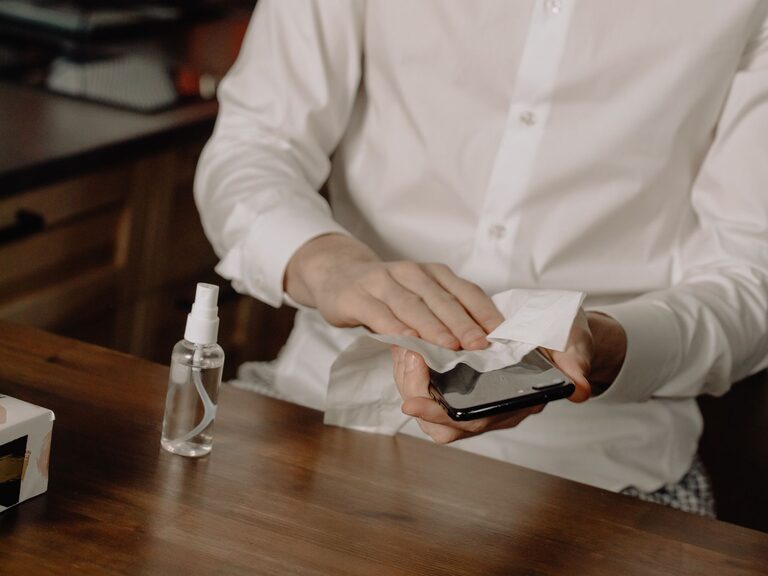
Lightly dampen a microfiber cloth with water or a cleaning product specifically approved for electronic screens. The cloth should be damp, not wet. Never spray liquid directly onto the phone.
Wipe the screen using gentle, even strokes. Follow with a dry part of the cloth to remove streaks. Clean the back and sides in the same way, paying attention to areas that receive frequent contact, such as the edges and buttons.
Many manufacturers allow a small amount of 70 percent isopropyl alcohol on a soft cloth for exterior surfaces. However, instructions differ by device. Alcohol may affect certain coatings, adhesives, or decorative finishes, so confirm that it is suitable before using it.
Keep all moisture away from:
– Charging ports
– Speakers and microphones
– SIM card openings
– Buttons and seams
– Camera lenses and other openings
If liquid accidentally enters the phone, stop cleaning, disconnect it from power, and allow it to dry fully. Do not use a hair dryer or place the phone in rice. Heat and loose particles can cause additional problems.
3. Clean the Camera Lens Carefully
The camera lens can collect fingerprints and dust that affect image quality. Use a clean, dry microfiber cloth and gentle circular movements.
If a mark remains, slightly dampen a corner of the cloth with an approved screen or electronics cleaner. Do not apply liquid directly to the lens. Avoid rough fabric, paper towels, and abrasive products that could scratch the lens cover.
How to Clean a Laptop Keyboard
A laptop keyboard needs extra care because liquid can travel through the gaps between keys and reach internal components.
1. Turn the Laptop Off
Shut down the laptop completely, unplug the charger, and disconnect other accessories. Do not clean a laptop keyboard while it is running or charging.
Open the screen at a comfortable angle, then turn the laptop upside down briefly and give it a few gentle shakes over a clear surface. This can loosen crumbs. Do not shake forcefully, as sudden movement may stress hinges or other parts.
2. Remove Dust and Crumbs
Use a soft brush or hand-operated air blower to lift debris from between the keys. Work from different angles, but avoid forcing dirt deeper into the keyboard.
If using compressed air, follow the product instructions and keep the can upright. Use short bursts from a safe distance. Tilting the can may release cold liquid, which can damage surfaces. Avoid using excessive pressure, especially on low-profile laptop keys.
A vacuum cleaner is usually not the best choice for delicate keyboards. Strong suction may pull at keycaps or create static. If you use one, select a low setting and keep the nozzle away from the keys.
3. Wipe the Keys and Palm Rest
Lightly dampen a microfiber cloth with water or an electronics-safe cleaner. Wring it out well, then wipe the key surfaces, palm rest, trackpad, and exterior.
Never pour or spray cleaner onto the keyboard. Do not allow liquid to pool around the keys. Use a dry cloth afterward to remove any remaining moisture.
For narrow gaps, a barely damp cotton swab can help clean around individual keys. It should not be wet enough to leave drops behind.
How to Clean a Separate Keyboard
A wired or wireless desktop keyboard is often easier to clean because it can be disconnected completely.
Unplug it or turn it off and remove the batteries. If the keyboard has removable keycaps, take a photo first so you can replace them correctly. Remove keycaps only if the manufacturer allows it and use a proper keycap puller rather than a sharp tool.
Brush or blow away loose debris, then wipe the keycaps and frame with a lightly damp microfiber cloth. If the keycaps are washable, place them in mild soapy water according to the keyboard maker’s instructions. Rinse them thoroughly and let them dry completely—often overnight—before reinstalling them.
Mechanical keyboards may have switches and stabilizers that are sensitive to excess moisture. Keep cleaning solution away from the exposed switch openings and never reassemble the keyboard until every part is fully dry.
Cleaning Routine and Final Checks
For frequently used devices, wipe the phone and keyboard once or twice a week, or more often if they become visibly dirty. Clean spills as soon as possible, but always power down first when safe to do so.
After cleaning, check that:
– The phone and keyboard are completely dry
– Charging ports and openings are clear
– Keys press normally
– No cloth fibers or debris remain
– Cables and accessories are reconnected securely
Do not use damaged cables, swollen batteries, or devices that show signs of liquid damage. Set them aside and follow the manufacturer’s support instructions.
With a dry microfiber cloth, gentle tools, and a small amount of approved cleaner, you can safely maintain your phone and keyboard without exposing them to unnecessary moisture or harsh chemicals.
About the Author